While digging around on the internet for ideas for my first 3D printer project, I stumbled across some bike modifications that looked cool. It just so happens that I have a two bikes that are in need of repair. One bike has a flat tire and the other has an out-of-true back wheel and a few broken spokes. After reading up a bit more on the mechanics of 3D printing and digging around for some designs, I settled on two files and cleared out one of my Saturdays to attempt the print.
The first print is a spoke wrench. While these are typically made of metal, I figured I would be able to use this to tighten up and tune some spokes with the tool and then use a normal wrench if I needed more tension. Plus, this particular object looks like a very beginner friendly print. I settled on this design. Before getting started, I spent the morning watching some you tube videos. This particular series by youtube user ‘Life and Times of Tyler‘ was very helpful. It covered all the basics of getting setup with the Monoprice printer, and he has a lot of very useful advice that I found lacking in a lot of other online tutorials.
After watching some of the videos, I came up with a game plan. I did a much more through bed leveling attempt this time around (not that that was an issue the with the test print, but just wanted to be safe), and I replaced the scotch tape on the print bed with some painters tape that I had ordered online (the scotch tape that came with the printer was already bubbling after the first print). I loaded up the spoke wrench STL file into CURA (a program that takes design files and then converts that file into a series of instructions for your printer) and tweaked the setting based on Tyler’s advice. Because this was a pretty simple part, I didn’t have to mess with the orientation or anything more complicated. I loaded up the CURA file to the SD card, pre-heated the printer, and kicked off the print.
-
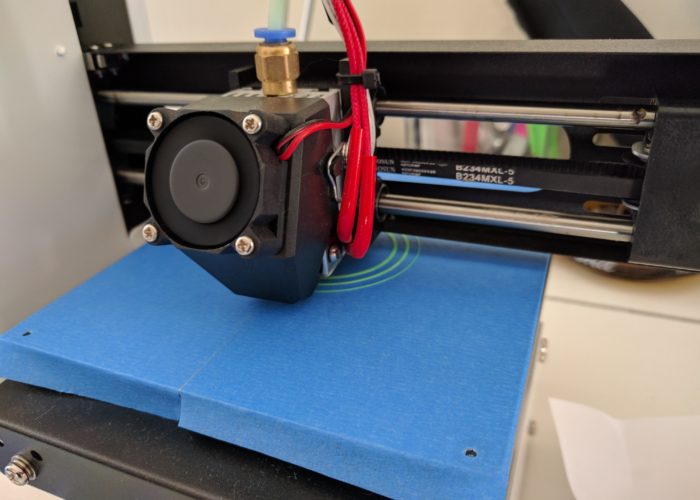 Starting the spoke wrench print.
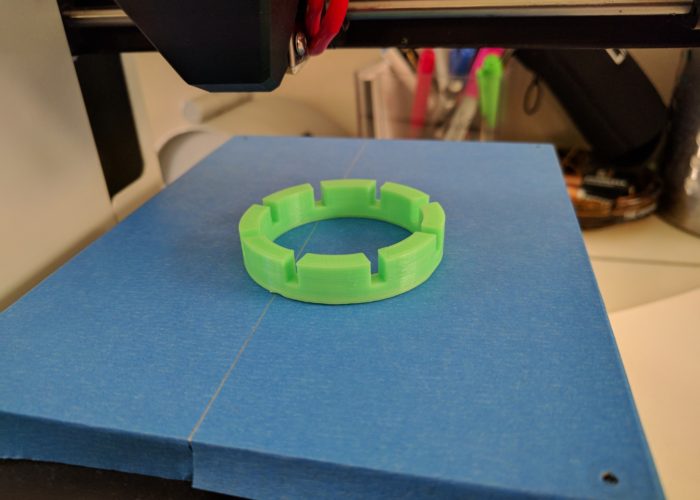
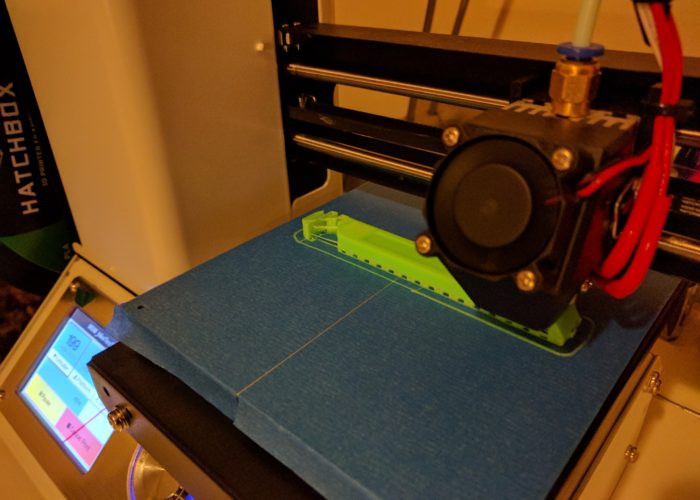
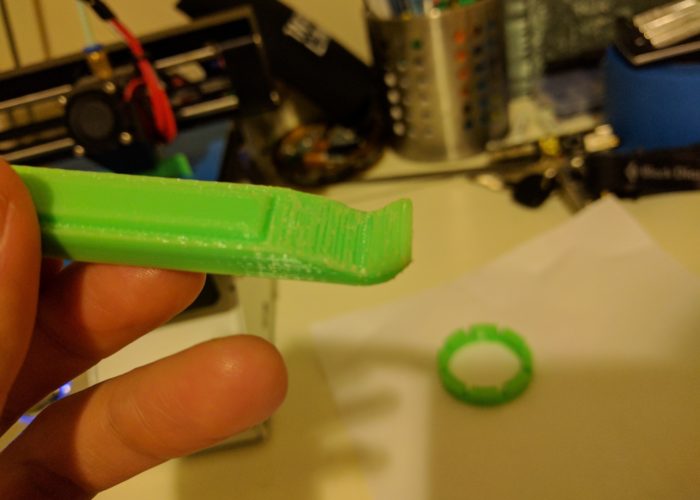
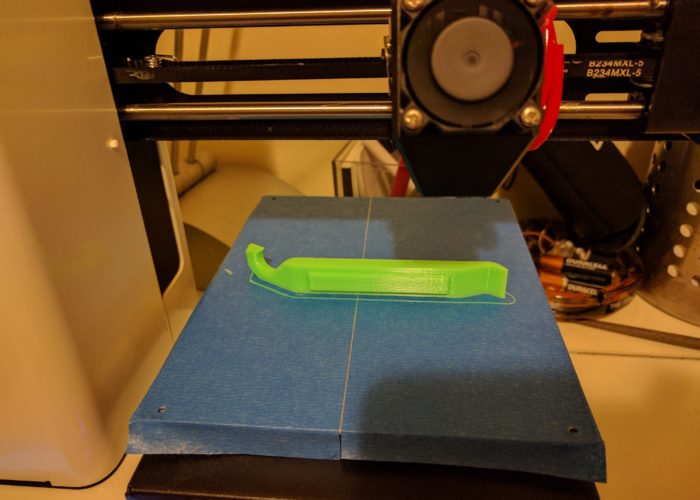
After about an hour I had a pretty cool looking spoke wrench. Emboldened by my success, I moved on to setting up the bike tire lever print. I used this design. I choose this one because it seemed to have a nice balance between simplicity and functionality. I wanted to have a spoke hook on the lever because those can be very useful when changing tires, but some of the other designs seemed like they would require support material. Additionally, the lever looked thick enough throughout that it could feasibly handle the stress of the tire change. So I loaded the STL file into CURA and started playing around with things. Curiously, the default orientation when I loaded the file was with the lever flat, with the spoke hook angled up into the air. It seemed like I would need supports enabled for it to print properly, so I enabled that in CURA. I was a little worried though because Tyler mentioned that he had a lot of trouble getting the supports to come off cleanly from the part. I figured there were pretty good odds that these tire levers weren’t going to hold up the stresses of real life, so I pushed forward with the print as-is because I figured it would be good to see what how these support structures work.
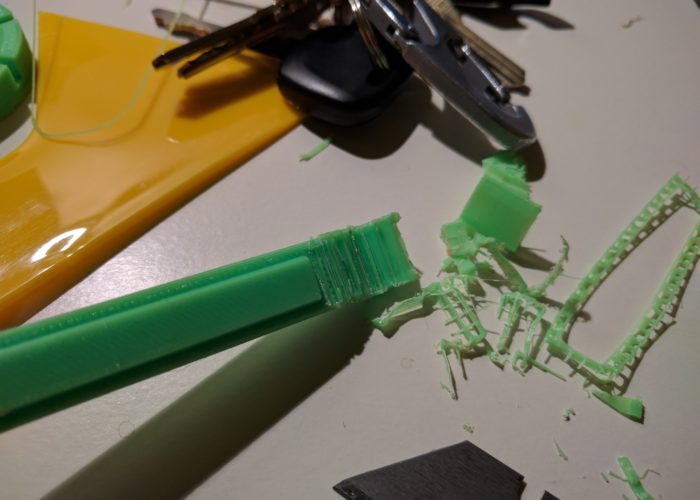
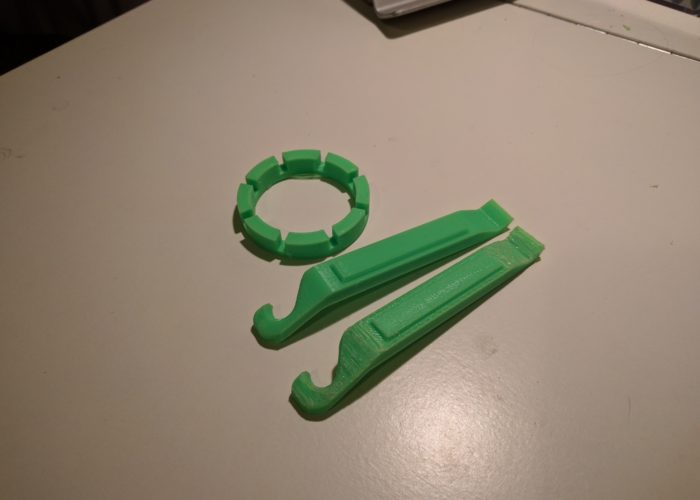
Sure enough, after the print was done. I attempted to remove the support structures (see photos in slide show) but it was pretty difficult. I ended up using a razor and file to pull the material off, and in the end still ended up with a very rough surface. I decided that for the second tire lever, I would print the lever on it’s side which seemed like I could get away with out support material. Another possible advantage of that orientation was that it could increase strength of the part (3D printers are stronger in the x-y axis, and weaker in the z axis). So I went back into CURA and made the changes and then kicked off the print.
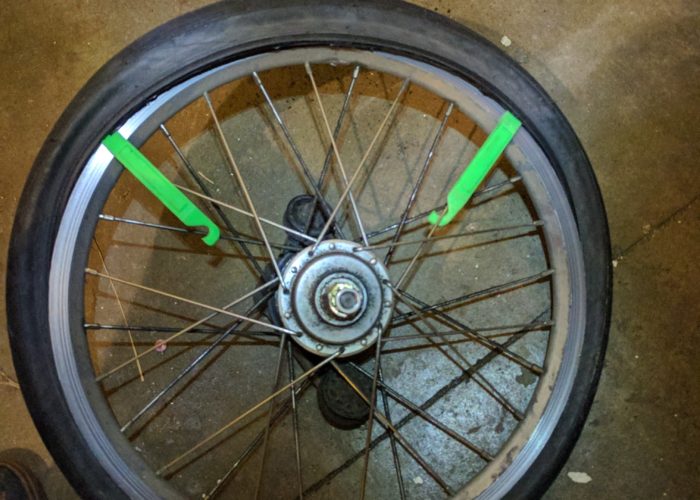
The second tire lever turned out surprisingly well. I went online and ordered a new bike tube for one of my bikes. Once the tube arrived, I got to changing the tire, and I successfully removed the tire without either of the levers breaking. I did chip one of the levers (the one printed flat) when attempting to put the tire back on (partly my fault, I was hammering it against the tire bead to try and get the bead back in the rim, the lever definitely wasn’t built for that abuse). So all in all, I consider this little project a success. I could have bought a cheap pair of tire levers online, but it was good to get some more experience with the printer. Also, I am still waiting for some replacement bike spokes to get shipped, so I will update the blog once I get around to using the spoke wrench. Cheers!