I have been playing around with arduinos and electronics for a few years now, but progress on projects has been really slow. While I have had some fun with the hobby and have learned a lot, the pace of progress can be very frustrating at times. Between not having the right parts on hand, to spending whole weekends troubleshooting issues with the hardware or sensors, it can feel like for every step forward, I take two steps back.
Case in point, a few weeks ago I finally got around to working on a minibot kit that I had bought from sparkfun a few years earlier. When I first got the kit, I ran into an issue with the FTDI chip in the board. After some back and forth with Sparkfun’s customer service, we determined that it was a faulty board, and they were kind enough to send out a replacement. At the time I did not have a desoldering pump, so when the replacement board arrived I spent a number of hours struggling to remove components from the original board until I finally gave up in frustration and ordered a desoldering pump online. In the two weeks it took for the pump to arrive, other priorities pulled my attention away from the kit and it ended up getting stashed into storage with all my other half completed projects.
After a few years of the kit sitting in storage, I finally decided to give it another go. I ordered a few parts that I thought would make for good upgrades, I pulled off the components of the old board, and soldered them to the replacement board. I plugged in the battery and set the bot on the ground and … silence….
The board had come with a sketch preloaded on the microcontroller, but for some reason the program was not running. I attempted to revive the board by uploading a copy of the original sketch. And of course I got an error: avrdude: stk500_getsync(): not in sync: resp 0x00. Ugghhh.
The next week I spent a few hours searching the internet for a possible solution. Finding solutions for hardware problems can be tricky because the specific errors that you get can be very dependent on the components and configuration that you are using in your project, and because hardware issues often have multiple possible causes (bad configuration, faulty connections, bad/broken components, etc…). After crossing off a few of the more obvious potential causes, I stumbled across this post. The commenter was having similar issues as I was and was able to solve the problem by uploading a new bootloader to the board. While the solution looked promising I was a bit nervous about attempting the fix because the solution involved using a second arduino to act as an ISP Programmer in order to burn a new bootloader to the malfunctioning microcontroller.
-
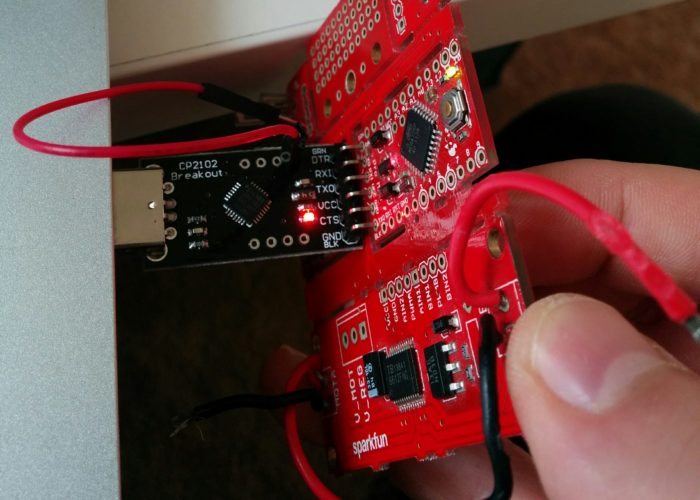 Hooking up an FTDI chip to the original board. Probably would have been a good idea to solder on some headers, loose connections make for precarious situations
Considering the complexity of the solution I was concerned that I could permanently damage the board somehow. Fortunately, I still had the original board that came with the kit, and as far as I knew the microcontroller on that board was still functional (during my back and forth with Sparkfun, we had came to the conclusion that it was the onboard FTDI chip that was malfunctioning). I hooked up the old board to a working FTDI chip, bypassing the broken onboard chip and tested to see if I would get the same error. And as luck would have it, the sketch failed to load (one of the few times I was glad to see an error pop up).
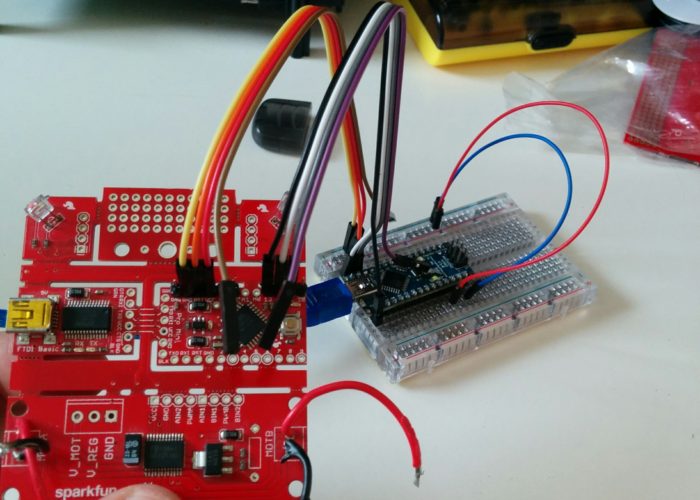
Once I had confirmed that the old board had the same issue as the replacement board, I configured an Arduino UNO to act as a programmer and hooked it up to the microcontroller. I initiated the bootloader burn and the moment following was best described by rubinoe, the commenter who posted the solution on the sparkfun forums:
This was a magical moment for me. All kinds of LEDS were blinking and flashing. After a few seconds the IDE said: Done burning bootloader, thank you. …. I was so excited that this worked I let my wife sucker me into going to the arts and crafts store so she could buy some new sewing thread. Don’t fall for this.
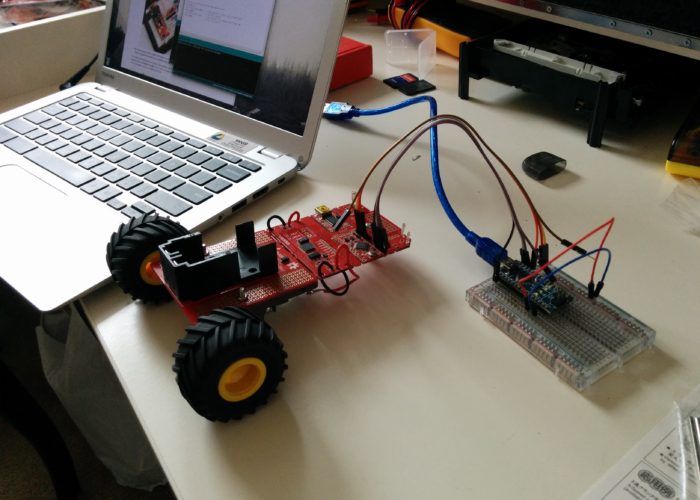
I confirmed that it had worked by hooking up the board to the FTDI chip and loading up a blink sketch. I then repeated the bootloader burning process with the fully functional board and was much relieved when I was finally able to load the example minibot sketch and watch the bot skitter across the floor and clumsily and unsuccessfully attempt to avoid objects.
So there I was, many hours of work invested, and a few years since I had originally purchased the kit, and I finally had a working bot. And of course I still haven’t gotten around to any of the planned upgrades and improvements[1] in the weeks since I made this fix. Part of me is glad for the learning experiences that I had while trying to get things working, and now that I know how to bypass the FTDI on the broken board, I can part that board out and use it to build a second bot. But part of me is really frustrated that it has taken this long to get the bot to where it currently is. It’s mostly my fault for not pushing things forward, but when solving simple errors can consume an entire weekend, I guess I shouldn’t be too hard on myself for not getting things done faster. Anyways, back to procrastinating!
[1] My plans are to add remote control (via wifi or radio), some additional sensors, and upgrade to a tank chassis. I will try and post about these improvements when I finally get around to them.